Decals and Screen Printing

This is the main board for discussing general techniques, tools, and processes for fusing, slumping, and related kiln-forming activities.

Moderators: Brad Walker, Tony Smith

Post Reply
Mike Jordan
Posts: 94
Joined: Mon Nov 06, 2006 11:13 pm
Location: Hillsboro, OR
Contact:

Decals and Screen Printing

Post by Mike Jordan »

Although I've been working on a couple of things, I've not had a lot of time to take pictures of them over the last several weeks. So today I made some time this afternoon to grab some quick shots of the screen printing I've been trying and decals I've been testing that I learned about in the thread here: http://www.warmglass.com/phpBB/viewtopi ... =2&t=40971

I've been playing with screen printing off and on over most of the summer. The biggest problem I've had (among all of the big problems I've had :D) has been to get an image that will work when it's converted and burned on a screen. I decided I didn't want to add the complexity of buying a screen and putting on the emulsion and then burning an image on it, so I took the short cut and bought screens that were already photo ready. I just had to create a image on film that I could expose and wash out. I got an image from one of my photographs that I thought might work, turned it into a black and white silhouette, printed it to 3 sheets of laser print film and started exposing. I bought a couple of UV lights and put them in my light box, replacing the florescent tubes in it. After a number of test exposures, I could see I wasn't getting anywhere fast. I was up to 25 minutes exposure and it was still coming out under exposed. So I decided to do it like so many others have done and just used the sun. Luckily, since it was summer at the time, we were having a 4 week sunny spell here in the Northwest, so this worked out pretty well. I found that about 25 seconds was all I needed to give me a proper exposure that washed out correctly. I did find out though that the 3 layers of laser film I used (stacked images) didn't really create a dense enough black image, so I lost some of the detail in the image. Next I went to a solid image. I took one of the dog profiles I had had cut out of black Bullseye glass by water jet this summer and used it as my positive to create the negative screen image. It worked. I now had a screen to try printing with. I had previously bought some already mixed glass fusing paints from Barry Kaiser and those are what I used for my first screen printing attempt.

I spread black fusing paint on the screen and then squeegeed it onto the glass. The paint was not thick enough and I got more of a blob than an image. Barry suggested I get some flux to add to the paints, so I got some of that. This is a white powder that you mix with the paint. It thickens it up and also lowers the maturing temp a bit, which was good since the paints mature between 1400 and 1450 and for testing I didn't really want to go to full fusing temps since I was using single layer glass. On this attempt I could tell it was a lot better when I squeegeed the paint. It didn't help my ability or the image, but the paint was much better. :D

Here is the 3rd attempt I did with the first image I was trying to use after it was fired:

Image

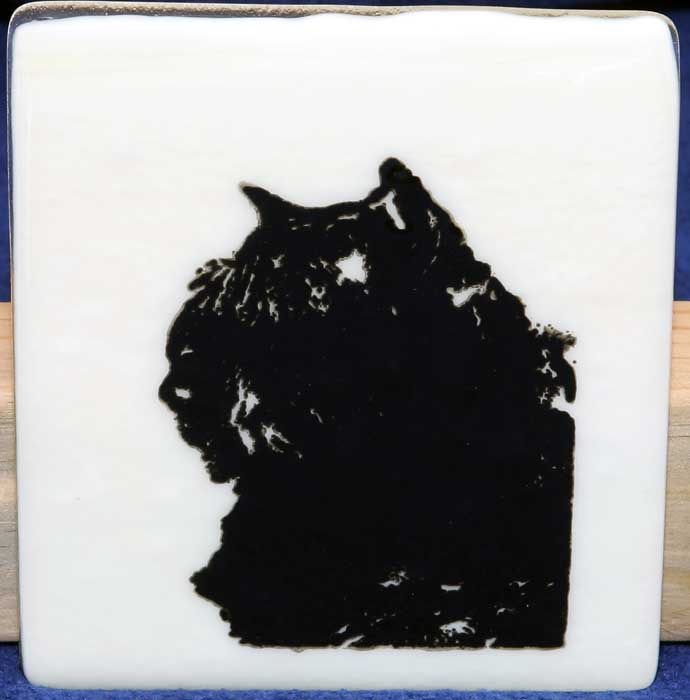
I didn't have the detail I was hoping for so next I went to a sold profile. I'll show a picture of that one in a bit.

A few weeks ago I read the post listed above about a place that prints decals for ceramics and glass which sounded pretty interesting and wasn't all that expensive.

What you do is create a page for your images that is 10"x15" and has what ever you want on it that you want decals made of. You can put as much as you can fit on the page and he prints it off and sends you the sheet. You then cut out the images to fuse on your glass. They do a print run once a week for normal priority and you have to have your order in by the day before. I had my sheet a couple of days after their print day.

I picked a handful of images to test it with and didn't fill the page as full as I could. I figure if they come out good, I'll be getting more later. I cut out and fused 3 of the images from my page and pretty much followed the directions on their web site other than I speeded up their schedule a bit and I did use Bullseye glass. They said that Bullseye may not be as smooth as the decals need to keep from getting bubbles with. I was careful to squeegee the decals on real well although I did still get a few small pin prick type bubbles that formed and popped. I didn't find them all that bad although I can see for something really important it may be better to go with Spectrum that has a smoother finish than Bullseye.

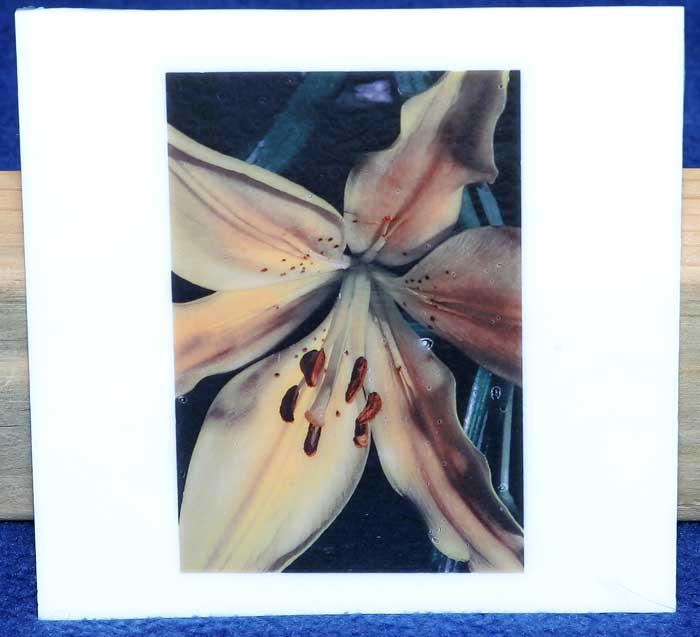
2 of the decals I put on solid colored glass and one of them I put on Crystal Clear Tekta. I can see where the image will need to be a certain type to work with clear as the image I used was washed out a bit. I can see the potential for something like a sun catcher with a very colorful image on it that would work well. The printer does not print white, so if you have white in your image you put it on white glass to add the white areas or keep that in mind so you can work around it. The flowers I did had some white in them so I put it on a white piece of glass.

Here are the images I did:

This one of my pictures of a yellow Lilly:
Image

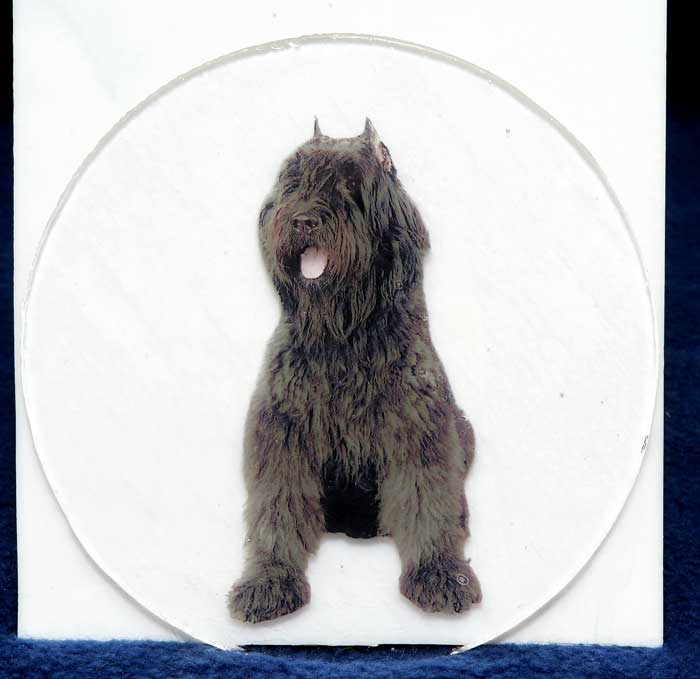
This is a picture of one of our Bouviers that I did on a clear piece of Tekta. I have a white piece of glass behind it so it's easier to see.
Image

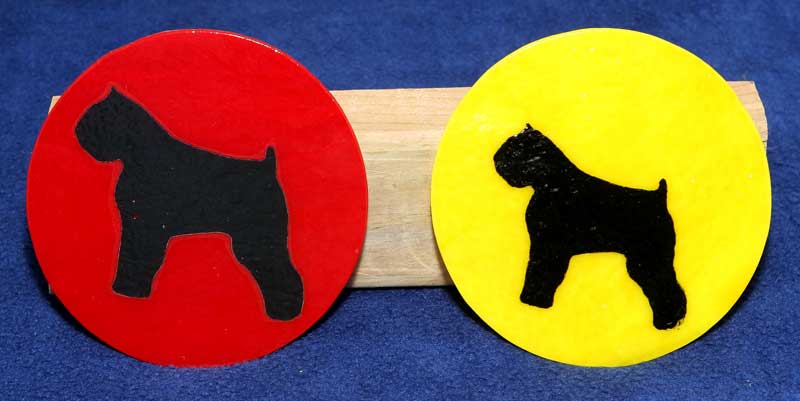
This image has two 5" circles. The red on the left is the decal and the yellow on the right is my screen print I mentioned above. The whitish areas around the head is a little bit of light reflecting and not the screen print itself.
Image

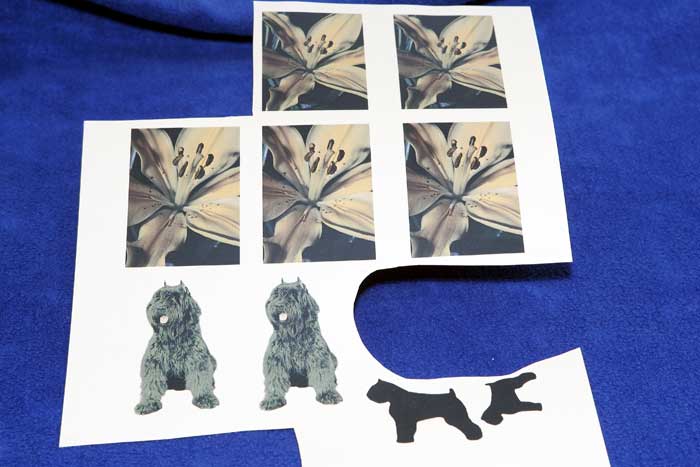
And here is my decal sheet with the images cut out and the others still on it. You can see I had lots of room to put more stuff if I wanted to squeeze them in some.
Image

The decals fused on the glass really well. They are fused in permanently and you can't feel them. One thing I did notice though is that the film that the image is printed on does show a little bit when you hold it just right in the light. The web site says this burns off but evidently it doesn't or this part doesn't burn off. I used a clunky pair of scissors to cut them out (I didn't feel like going upstairs and hunting up a small snipping pair that would have worked better) so I was about 1/4" or so away from the edges of the image itself. Next time I won't be so lazy and will get a pair that will let me snip right up to the image.

So there you have it. I can see some good possibilities with the decals and I think that it will be easier than trying to screen print some of the things I want to put on glass. As soon as I get time to go through some of my images and find those that I think will work good I'm going to order some more.

Mike
It's said that inside each of us is an artist trying to get out. Well mine got out... and I haven't seen him since.
Drewcilla
Posts: 60
Joined: Fri Apr 11, 2008 9:10 am

Re: Decals and Screen Printing

Post by Drewcilla »

Mike, thank you so much for all the detail in this post. I, too, have been experimenting with screen printing since last spring. I didn't have trouble with the images, but getting the correct exposure time was difficult for me. (I want to thank Ted Bach on this board for a detailed post he wrote last year in answer to a question about TPI.) I used Ulano EZ film and was successful about 50% of the time. When I got the exposure right it was great; otherwise, a disaster and several hours wasted. I started following the Bullseye recent video tutorial using Mask Ease. That is working very well for me but there are limitations. Like you, there are other things I would like to put on glass, so thank you for the very detailed and informative post. I am a caretaker and cannot travel outside my area to classes. I am very much indebted to the kindness of those on this board who so generously share their expertise.

Drewcilla
Terry Gallentine
Posts: 190
Joined: Mon Jul 19, 2004 2:08 pm
Location: River Falls, WI
Contact:

Re: Decals and Screen Printing

Post by Terry Gallentine »

I also read about the decals made by the studio in Minneapolis. What I wonder about is the color density of the decals. Do they look dense enough when they are used on clear glass being lighted primarily from behind the glass? I know years ago a four color printing system for ceramic colorants was developed by DuPont Germany but the printers were sold as a complete system and were extremely expensive. The color density of those decals was sufficient for tiles or opaque glass but not for glass where light was transmitted primarily through the glass work. What quality of color density do these decals have?
Barry Kaiser
Posts: 307
Joined: Mon Jul 25, 2005 6:54 pm
Location: North Carolina
Contact:

Re: Decals and Screen Printing

Post by Barry Kaiser »

Hi Mike,
You did a lot of experimenting with screen printing and I wanted to add some from my experience. I have found that exposure is not a simple...put it under the light for X minutes. Distance from screen to light, density of light (how many bulbs), types of bulbs, density of original image, and distribution of light are every bit as important as time. Having taught this technique for years I have found that the best way for smaller prints (up to 4") is to use one 20 watt UV fluorescent bulb, 2 inches below the image. Leave that as a constant and vary the rest. If you want a wider print, put a second bulb 6 inches apart (not 4 as everyone want to do) from the first. I start with a 2 1/2 minute expose. The tendency is to OVEREXPOSE, not underexpose. If you don't get a good complete washout, it is usually not because of underexposure, but because of overexposure.

As to printing, the viscosity (thickness) or the Kaiser Glass Paint is critical! The paint needs to be quite thick. We emphasize to out students to stir the paint well before printing. There is a strong tendency to look at the paint and say "it looks thick" then wonder why you get a ghosting around the printed image. Stir the paint well, getting to the stuff on the bottom of the jar. Adding flux(glass) is often necessary to achieve a thick printing paint.

Printing technique is another critical element in screen printing. It is not just "slap the paint on and remove the screen. We get into this in detail in our classes. This is probably the most critical element in achieving a good print.
Valerie Adams
Posts: 587
Joined: Mon Apr 19, 2004 2:49 pm
Location: Santa Rosa, California
Contact:

Re: Decals and Screen Printing

Post by Valerie Adams »

Mike, if you pre-fire your glass, you'll get a smoother surface to print on.
Mike Jordan
Posts: 94
Joined: Mon Nov 06, 2006 11:13 pm
Location: Hillsboro, OR
Contact:

Re: Decals and Screen Printing

Post by Mike Jordan »

Drewcilla, I have used Barry Kaiser's screens that are ready to expose and also the Stencil Pro kit. I used Barry's when I was trying to get the UV lights to work and then bought the high res Stencil Pro kit and went with sunshine. I'm pretty sure' the Kaiser screens would have also worked very well with the sunshine had I tried that with them. I still have some non-exposed screens that I'm going to try once our sun comes back next June. Maybe I'll have some images by then. :D I have lots of classes in my area (I work a few miles from Bullseye) but my problem is that with my job, a lot of times I take time off to go to the classes and something happens and I get called back to work to fix it and by the time I get back (if I get back) I've missed something important and pretty must wasted my money. So I rarely get to go to the longer classes.

Terry, I think they could be dense enough with the right image. The image I put on clear was light to begin with with not a lot of color. It seems to hold color very well though. Something I thought of when I looked at it was to fuse decals on several pieces of clear glass and then layer them to get a denser image. They recommend fusing it first before capping, but once it's fused the individuals tiles could be fused. I also wonder what would happen if a 2nd decal was laid on the first fused one and it was fused again? I may have to try that since I have several decals of the flowers that I could over lay to see what happens. It might give a even denser image... or it may not. :D

Barry, one thing different for me is I want to do bigger screen prints. Most of what you show is for jewelry and other small things like that. So you are right about taking into consideration the size for exposure. I can see where using my light box for the UV bulbs did put them wider apart but I don't think they had the light output that I needed. I think I should have gone with 4 UV tubes rather than just the 2 I used. Mine did underexpose. I have a test strip I got from a local screen printing company (Ryonet which is just across the river from Portland) and it shows the exposure steps from a single exposure. Oh, and I did stir up your paints real well each time I used them. Your suggestion on using the flux made a big difference on the last test I ran. What I also did was brush on more paint after I screen printed it since it was solid with no details. The un-fluxed paint flowed out a bit and gave me a thicker image when it fused. I think I over did it with ordering two jars of your flux though, it goes a long way with the paint. :D

Valerie, right, but I was impatient to give it a try and didn't want to go through a pre-fuse and then a fuse and then another fuse if I capped it. If I do something a little more important I will pre-fuse to get the smoother surface since I'll stick with Bullseye unless I try it on float glass.

One thing I am wondering is how it would react to a slump or doing a drop through a ring. Does the decal stretch or will it stay the same size and distort, distort or pull away from the glass. I want to do the dog profiles on some of my spoon rests so I'll have to test and see how it does when I slump one of them.

Thanks for the comments and I hope others do try either the screen printing, decals or both.

Mike
It's said that inside each of us is an artist trying to get out. Well mine got out... and I haven't seen him since.
Barry Kaiser
Posts: 307
Joined: Mon Jul 25, 2005 6:54 pm
Location: North Carolina
Contact:

Re: Decals and Screen Printing

Post by Barry Kaiser »

HI Mike,
I have the light setup with the 20W UV bulb set 2" above the screen. to expand the size, I used a second bulb 6" from (and parallel to) the first. Using that I have done a complete 8.5x11 image. It worked fine. Note that initially I tried a 4" spread. It gave too much light half way between the bulbs.
Thickness of the paint is the key to printing. Too thin and you get image spread. Too thick (not easy to do) and it does not penetrate the screen easily.
The new Kaiser flux does go a long way in thickening the paints. There is plenty of pigment in the paints that the color does not dilute.

Barry
Terry Gallentine
Posts: 190
Joined: Mon Jul 19, 2004 2:08 pm
Location: River Falls, WI
Contact:

Re: Decals and Screen Printing

Post by Terry Gallentine »

Mike,
Screen printing is a constant stream of problem solving. It is hard enough printing standard inks on a simple substrate like paper but when you are printing ceramic mediums on glass, you multiply greatly the possibility of problems. I have been screen printing for 35 years (25 years specifically on glass) and I still run into new and diabolical problems. Keep on plugging away at it. If you are interested on creating imagery on glass, screen printing is still one of the best approaches.
Post Reply